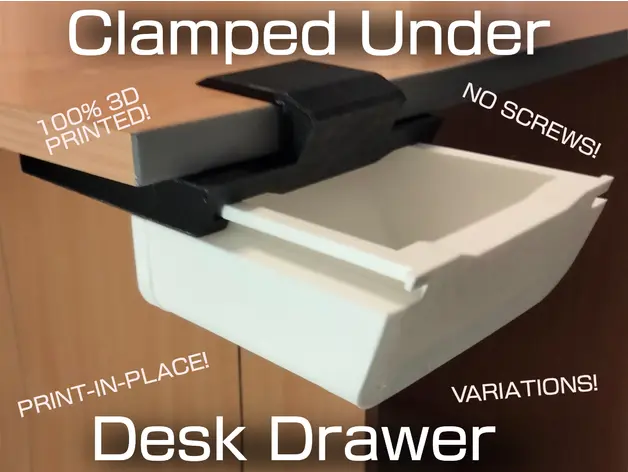
Clamped Under Desk Drawer by EddieEdEdwardo
Clamped Under Desk Drawer by EddieEdEdwardo
https://www.thingiverse.com/thing:6475392
This is a fully 3D printable clamped under desk drawer. What makes this drawer different? Well, Because it's clamped, you don't need to ruin the bottom of your desk with screw holes!
Fixing a sewing machine with a 3dprinted spur gear

Fixing a sewing machine with a 3dprinted spur gear
Want a 3D printer in New York? Get ready for fingerprinting and a 15 day wait
NY State Assembly Bill 2023-A8132
https://www.nysenate.gov/legislation/bills/2023/A8132
Requires a criminal history background check for the purchase of a three-dimensional printer capable of creating firearms; prohibits sale to a person who would be disqualified on the basis of criminal history from being granted a license to possess a firearm.

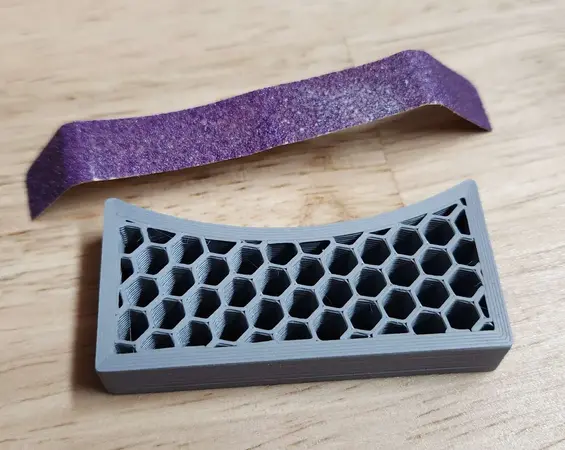
I made this extension cord cover, around $1 per foot in filament cost
Compact Cord Cover for hard floor by p1mrx
https://www.thingiverse.com/thing:6480745
The goal of this project is to design a cover for an 8mm⌀ extension cord at my makerspace, strong enough to walk on, at minimum cost. The parts assemble to form a rigid triangle, with the top in compression and the base in tension. Filament usage: 170 g/m (52 g/ft) Filament cost at $20/kg PLA: $3.40/m ($1.04/ft) The STL files contain 100mm extrusions; you should scale them to the desired length. For example, to span a distance of 1080 mm, you could print the following: cord_cover_top_3x.stl, scaled to Z=180%, 3×2 copies: 180×3×2 = 1080 mm cord_cover_base.stl, scaled to Y=180%, 5 copies: 180×5 = 900 mm cord_cover_base.stl, scaled to Y=90%, 2 copies: 90×2 = 180 mm When assembling, stagger the top and base parts like bricks, with 50% overlap. The final base (would be #6 in this example) is split in half and positioned at the ends. The top_1x and top_3x STLs are equivalent, but top_3x is theoretically less wobbly because the 3 parts can support each other. I recommend printing 20mm extrusions first, for quality/strength testing: cord_cover_top_1x.stl, scaled to Z=20% cord_cover_base.stl, scaled to Y=20% PrusaSlicer settings for 'top': Scale in the Z direction 0.2 mm layer height 1 wall 99% honeycomb infill (solid, with lines pointing in 3 directions for diversity) 0 top layers (let the infill handle it) 1 bottom layer (to help align with the raft) 3-layer raft with 0.15 mm Z distance (bed adhesion is important) Seam position: Random (print the horizontal stitches in both directions) No support PrusaSlicer settings for 'base': Scale in the Y direction 0.2 mm layer height 2 walls 100% rectilinear infill 0 top/bottom layers (let the infill handle it) No raft (the base is a huge rectangle) No support The "8mm" STLs have 8.1mm⌀ of internal clearance. I haven't built STLs for other diameters, but they can be made in Fusion 360: Modify > Change Parameters > (wire_diameter, top_thick, extrusion_length) Longprint is loooooooooong.

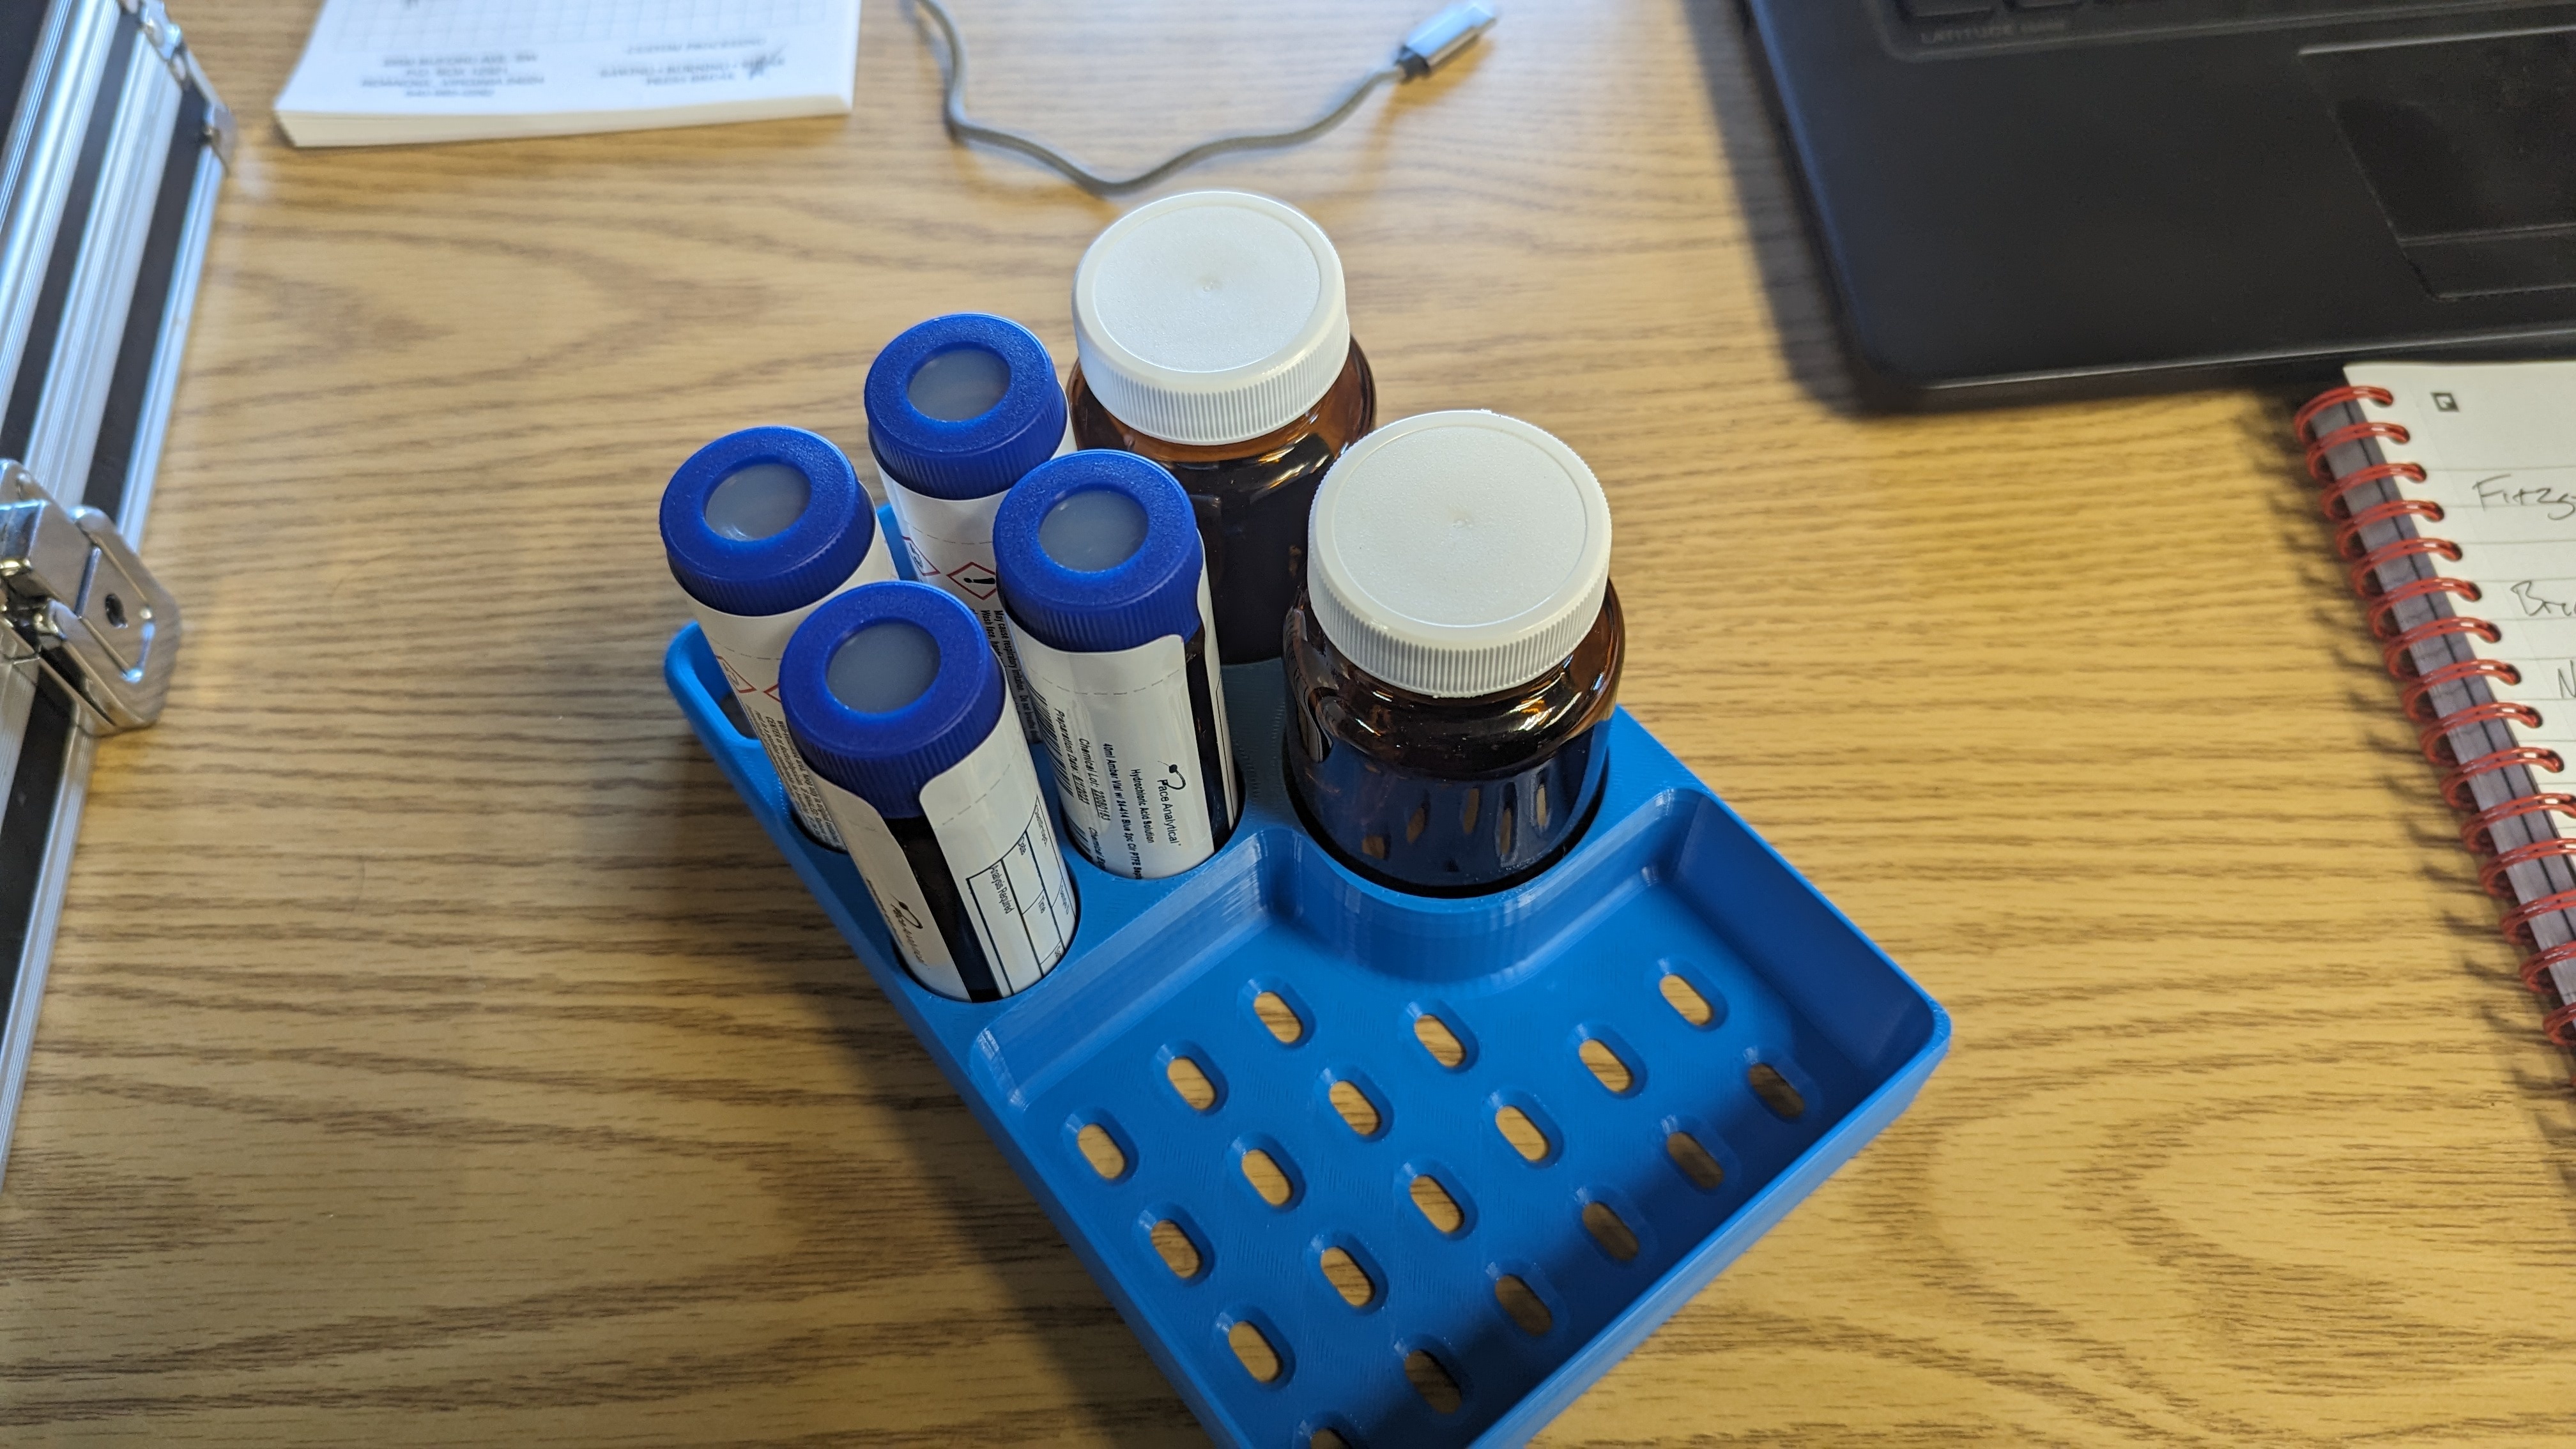
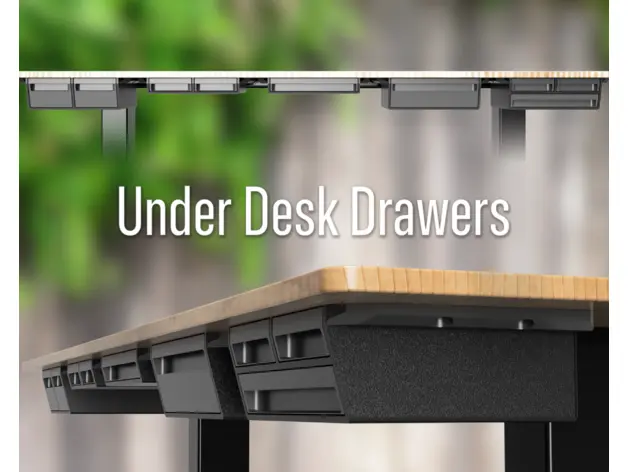
Under Desk Drawer by GodardScientific
Under Desk Drawer by GodardScientific
https://www.thingiverse.com/thing:6423138
Alright this project is growing.. needs a new description. I recommend printing the drawers laying bottom down with tree supports, or on their back. Either way should work, but bottom down will use less support material. To free the pins in the back after printing, place your fingers behind the pin and give it a few sharp taps with something solid, back of a screw driver worked for me. -The chassis print best on their back. You can fit everything onto one 250 cubed build plate as shown. If you are working with a printer with less than a 250 cubed plate, try the Slim Stack or the Split Body, they both will happily print on a machine as small as 200. From left to right in the top of the photo, we have the Big Double (Big Double file and print two Big Double Drawers) Slim Double (Slim Double, print two Slim Double Drawers) Slim Single (Slim Single file and Slim Single Drawer) Big Single (Big Single file and Big Single Drawer) Slim Triple (Slim Triple file, two Slim Double Drawers and one Slim Single Drawer) Not shown is the Split Body, which for now is just the Slim Triple. Also the Slim Stack, which is two Slim Double drawers on top of each other. To assemble the Split, print the Split Chassis L & R, the Split Bottom Drawer L&R the Drawer Tie, and TWO of the Body Ties. I recommend using your favorite relatively thin glue to adhere everything together, then print two Slim Single drawers to fill in the top. I am working on a detailed PDF like my Club and Store models have for this project, to provide more detailed instructions on printing, running through settings and assembly. Its just taking a while, as the project grows so do the instructions. v1.1 01-08-2024; Chassis modified to be printed more reliably v1.15 01-10-2024; Drawer pulls modified to print with less support if in horizontal orientation and no support if in vertical orientation Buy me a coffee :)https://www.buymeacoffee.com/godsci Patreon:(project videos, commercial salable files, upcoming projects, requests)https://www.patreon.com/GodardScientific

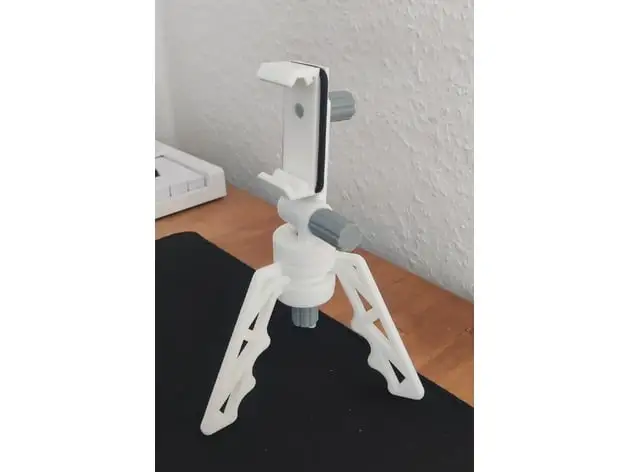
Smartphone Tripod for Landscape/Portrait mode by Yggy
Smartphone Tripod for Landscape/Portrait mode by Yggy
https://www.thingiverse.com/thing:6379306
This a remix of trentesous' very good foldable tripod Version 2. I remade the phone mount to rotate, allowing for both landscape and portrait modes. Find the original here: https://www.thingiverse.com/thing:2862445 Printing tips: Make sure to enable supports but use support blockers for the threaded bits The orientation of the parts should be as shown in the screenshot above I suggest using Gyroid infill with a high density of ~75 - 50% for the screws and ~25% for the rest